Our 2018 Kitchen Rennovation To The Nest
<< Previous | Kitchen | Demolition | Plaster '70s Wall | Plaster Cabinet Wall | Wall Cabinets | Sink Cabinets | Plumbing | Plaster Sink Wall | Flooring | Cabinets | Countertop and Sink | Finishing Touches | Next >>
(Saturday - 24 March 2018)
More major demolition on the wall and planning the drain and temp sink top. I spend some time in the morning
looking at drafting up a temporary "sink top" using 1x4 and 1x6 pieces, but realize that can wait until I
have a drain for the sink to connect to. A lower drain so that water won't have to run uphill 6". And new
supplies in the wall, not coming up through the floor. To accomplish that, I'll need to open up access to
the wall, and a LOT. Three stud spaces wide, so about 48", by about 30" tall off the floor.
That's a lot of plaster AND lathe! I save as much of the lathe as I can to reuse when we close that wall back up. It takes cutting some of it too since it extends behind plaster I don't want to remove. It's pretty much removing what looked like a previous patch from when a previous lead drain pipe was replaced with the soon to be replaced galvanized pipe. I'm guessing, but finding an old piece of lead pipe in the wall space and more lead pipe under the house is probably a good indication. With everything opened up, I can actually measure the new plumbing for fit, that is, if I had the new plumbing...
I really need to have at least the 2" to 1½" sanitee that will insert where I plan to crack out the old cast iron tee and galvanized drain line, but I really don't want to go to Lowe's tonight. Ann says come on, she'll go with me, we may as well have what we need for tomorrow. Or whenever, since I'm still not sure if I want to replace all the cast iron all the way to the new PVC laundry room tie in or just the section in the wall. Or whether I even want to do it tomorrow, if I'm still thinking about it now that is. I revise my list and we head out.
(Sunday - 25 March 2018)
Ann's off to go rent the cast iron pipe cutter from Home Depot down in Altamonte Springs. From the old house
in Wekiva, it's a few minutes down the road (SR 436). From here in Mount Dora, it's half an hour and a few
minutes. Originally I plan on going to get my hair cut while she does that, but they don't open until 10:00
AM. Guess I'll head down there tomorrow after work. Instead I spend some time bringing this up to date while
she's gone and grab something for breakfast. About the time I'm sitting down with my bowl of cereal, Nick
walks in the front door. And about the time I'm sitting down with my breakfast bar, Ann pulls in with the
tool.
Nick walks out to her car and comes back in with the tool, setting it on the kitchen floor. Time to get started. I'm trying and trying to get that silly pull ring behind the cast iron stack pipe, actually between it and the outside wall shiplap, but it's not cooperating. Even though the tool is meant for tight spots, I guess this one is tighter than they designed it for? I grab a chunk of 2x4 and the hammer and whack the shiplap "loose", at least loose enough to get the chain around it, with the help of Nick holding the tool and a piece of copper wire to create a bigger, albeit makeshift, loop to grab hold of...
The way this tool works is the chain has "pins" that extend from the pivot points of the links, and these pins fit into a set of "clevis links" of sorts on top and bottom. From there, an adjusting nut to snug the chain around the pipe, then a ratchet attached to the adjuster tightens the chain. The chain has "sharp" rollers that concentrate stress in a circle that eventually cracks the pipe. I snapped the first one above the old tee, but it cracks in an irregular pattern, not the clean break I'm expecting. It will probably be close enough, but I'm not sure if I'm through it all the way though.
I set up for another try and make damned sure I'm through it this time, both by visual inspection with concentrated light from the flashlight and physical movement. Alright, let's get set up for the lower cut. With Nick's help again holding the tool while I get the chain rigged up, we begin the next cut... Nope. It just crushes the bottom and cracks a big chunk out of the side - a lot further down than I'd planned (or removed plaster and lathe) for. I try again and get most of it, but it's still going to need cut with a hacksaw or cutoff wheel. Try the hacksaw, yeah, cutoff wheel it is. Guess it's time to RTFM?
Nick heads to his house to get the cutoff wheels and angle grinder while I look up whether we need a diamond wheel or not. When he gets back, he sets up and grinds both as flat as he can get them. Now all we can taste is rust. Yuck. I place the fernco no hub connectors on the cast iron, grab the sanitee, and measure the sizes I'll need to cut out of the length of 2" PVC pipe. Out to the garage to make the cut. I've found that my table saw does an excellent job at cutting plastic pipe, at least up to 3" or so. The alternative method to cutting the plastic pipe, a hacksaw, never makes a clean or straight cut! That or I've just never learned the trick to cutting straight with a hacksaw... Even with a miter box!
Back from the garage, and with the sanitee in place, I measure the size of the 1½" piece I'll need to fit between the sanitee and the stud so I can mark where I need to cut the hole for the new PVC drain line. Another trip to the garage and it's cut. With it in place, I mark the cutout for the drain line and grab the hole saw. I mark the approximate center and start drilling. I'm halfway through, but the drill bit isn't. A ¼" spade bit does the trick and I resume drilling from the other side of the old stud. I can tell I hit a nail about ¾ of the way through. Good thing that was a nice new sharp bell... (rolls eyes)
Time to measure the length of 1½" I need for the drain line. One more cut in the garage and a test fit says it's ready to glue up. First I about spill the cleaner, then the swab in the cap breaks loose! I knew the glue was about spent, even though Nick just used it not that long ago, but it does the trick and the new drain line is in!
<< Previous | Kitchen | Demolition | Plaster '70s Wall | Plaster Cabinet Wall | Wall Cabinets | Sink Cabinets | Plumbing | Plaster Sink Wall | Flooring | Cabinets | Countertop and Sink | Finishing Touches | Next >>
Nick asks what's next and I tell him getting down in the hole to see if we can get the copper through the hatch opening first of all, then whether we can get the 10' long copper, with a 2' riser attached, up through the holes the old galvanized iron pipes used to live in... Once we get them out that is! Before we can do that, we need to cut off the old CPVC supplies that are in the way of the pipe wrench and cap them off. I grab the CPVC caps, the plastic pipe cutter, the new cleaner and glue while Nick heads out to the shut off valve for the house.
Nick turns off the water and I start cutting and gluing on the caps. This time I pretend to use the old cleaner as a joke, but the joke's on me when I open what I think is the new cleaner. Nope. It's the yellow CPVC glue! Amazingly, the containers look identical! Gee, somehow I don't think that's an accident either. Oh well, Nick has a look at the difference between the orange and the yellow. Turns out the yellow sets up faster and is ready for use faster too. Yellow it is, but I have to fish out that damned swab from the old cleaner with the needlenose.
The cold water doesn't want to stop welling out, so Nick heads outside to open the hose bibs, to see if maybe that will stop it. Sure enough, I'm cleaning and gluing on the caps. We sit and wait for the glue to set up so we can turn the water to the house back on. While we wait, it's time to have a go at those old abandoned supply lines.
I had already removed the elbow from the old cold supply, and now that I can get leverage on the riser with the pipe wrench, it comes loose "easily". The hot water side, not so much. I have to push and bend just to get the pipe wrench on it, but it just keeps slipping on the pipe. Nick can tell I'm tired and asks to have a go. Well, it may not have been easier, but he snaps it off at the elbow under the house. Good enough for both of them to come out and open up the holes in the sill plate, making way for the new copper supplies.
At first I'm ready to just say the hell with it, we're done for today. But something tells me keep going. I bring both of the new copper lines in from leaning against the outside of the house, then I'm out to the garage yet again for some more copper for the risers. I thought I had a couple of leftovers from the bathroom. No such luck. I'll have to fetch that other 10' section down from the rafters, the one that sat out in the weather for months before I put it back up in the rafters.
I tape a cap over the end to try to keep the sand out of it while I test whether I can even fit it down through the hatch. It works. I'm able to shove it all the way down and manuever it into position, at least, without the risers soldered on I am. I cut two sections the same length as the old iron pipes and clean the ends, the elbows, and the other two 10' lengths in preparation for solder. A new flux brush and a coating of flux later and it's time for the torch. First one, let it cool a bit, then the other. There. Both new supplies with risers soldered.
I grab the first one, almost cool by now, and feed it under the house. Nick shines the light down the hole for the hot water supply in the kitchen. A bit of finagling and I manage to get it to where Nick can grab it with the needlenose pliers. As he's pulling up on it, I realize the old galvanized is in the way. Shoot. One of us will have to get under the house and cut it off with the grinder. We decide to get the cold water supply in place, then worry about cutting off the old pipe.
The new cold water line goes in about as quickly as the hot did, and this time Nick is able to pull it up past the foundation blocks to where it will rest on top of them and we won't have to worry about it falling back down the hole. Now Nick is heading under the side porch to cut off that damned old pipe. It doesn't take long and he's crawling back out with the chunk he just cut off in his hand.
There. Now let's move that refrigerator line. First we need to drill a new hole for it through the sill plate. Yet another trip to the garage for a drill bit big enough. Nick makes quick work of it then he's back under the house moving it into position. Done! By now it's after four o'clock, we're both filthy, and debating whether it's prudent to press on and try to cut in the new supplies or wait in case we run into a problem and Lowe's just closed.
Time to clean up and head to Tiajuanna Flats for supper and a bucket of beers.
Forgot to clean off the flux!!! Damnit!!! I knew I was going to forget to do it too!!! Guess I'm more tired than I thought.


(Monday - 26 March 2018)
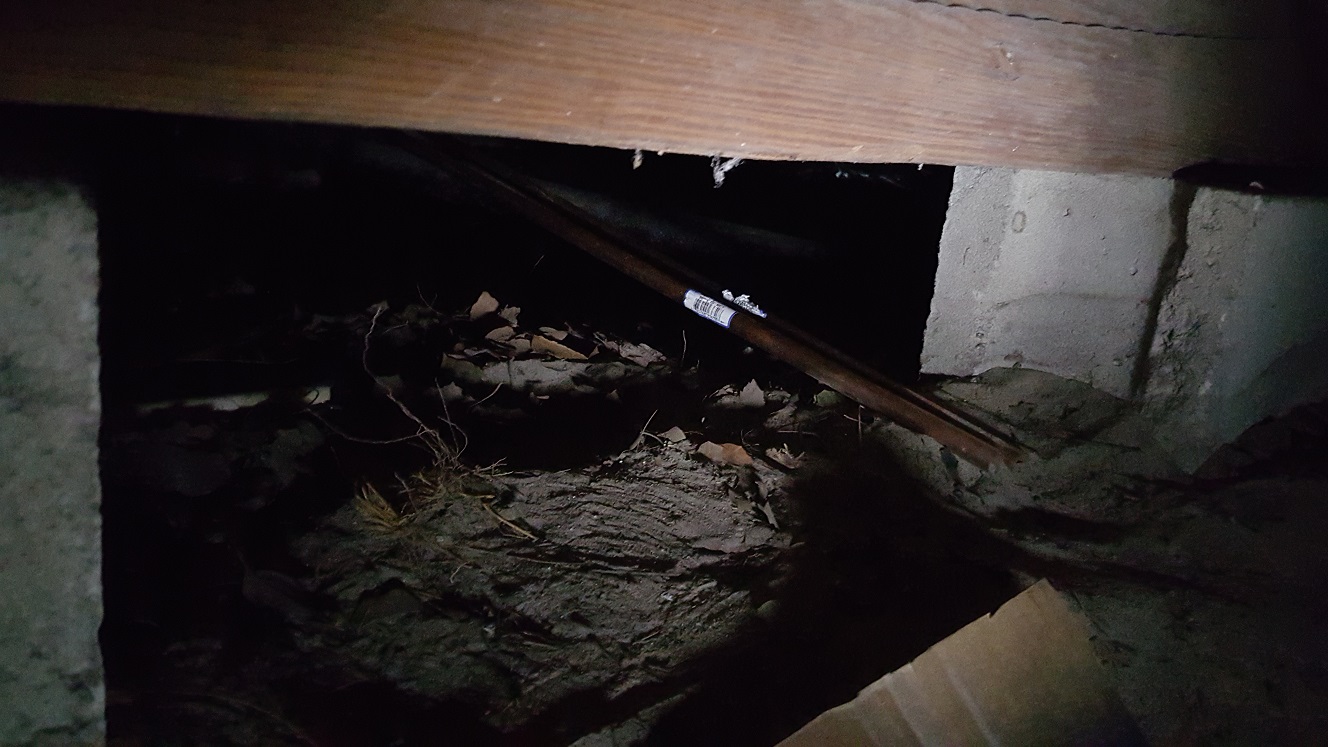
Down in the hole! This time to get more better pictures to help formulate the plan for finishing those
new copper supplies and cutting them in. At first I thought would have to crawl over to the outside wall
foundation blocks just to be able to feed the new copper supplies up through the wall sill plate, but it
worked out well, better than expected actually. I may still have to crawl under that beam just to cut in
the new lines though. Guess we'll see.
My plan is to try to cut out the old CPVC and cut in new CPVC to route the connections to just above the beam, where I may have better access and success. I tested my reach and I can just reach the old connections. Hopefully it will be enough to let me operate the cutter and clean and glue the new CPVC connections. The hot water supply comes from the back of the house as ¾" CPVC from the hot water heater. It runs through an elbow to a reducing "tee", where the old ½" CPVC hot water supply runs over the kitchen. The remaining ¾" CPVC goes through a couple more elbows to the shutoff valve for the bathroom supply.
The cold water supply is ¾" CPVC as well, but comes from the side of the house closer to the front and runs over to just before the beam and elbows back to a reducing "tee" that elbows into the old ½" CPVC supply that runs over the kitchen. Another ¾" "tee" elbows into the shutoff valve for the bathroom supply. The remaining ¾" CPVC runs to the back of the house to feed the hot water heater.
My plan is to snip the elbow off the cold supply to the kitchen at the reducing tee and redirect it with a new elbow in the opposite direction toward the beam and a union into the new copper. Hopefully there will be enough "meat" left on the output of the reducing tee. If not, well, time to cut out the old tee and put in a new one. The hot water is a little easier, but I will need to cut off the old elbow and tee and put in new ones, with the same idea of the union into the copper, but here it also needs to continue to feed the shutoff valve for the bathroom supply (on the other side of the tee).
Well there, that much is done, and that's about all I can do for now other than get covered with dirt head to toe with dirt from under the house. Sand and dirt covered in coal soot covered in oil furnace soot and now all of it covering me until I wash it off. It's that way every time I have to get under the house through the hatch where the oil furnace used to sit, until we took it out to remodel the bathroom that is. More like cut it out, but that's another story...
At least Ann has her answer to "What's next?" I guess the expectation is for me to already know exactly what I'm doing and what I'll need to get it done. Sometimes that just isn't the case. Sometimes I need more information, like just now, can I reach those places I need to operate on? Sometimes I need more time to strategize, to think out a plan of attack, playing it through over and over in my head to avoid the problems before having to deal with them for real. And sometimes, more often than not, I run into problems I didn't anticipate or couldn't avoid even with all the planning in the world.
And sometimes, I'm only human. When someone asks, "What's next?" I hear, "Why are you sitting on your lazy @$$ and not working on the project?" Because "I don't know" isn't the answer they wanted to hear. Sour grapes, but part of doing things like this. Be prepared for shouting matches and charged exchanges, for misunderstandings and harsh words, for stomping around and things not working out the way they were planned. Then have a beer and try to relax. Think about why you're going to all this effort. Think about what's important and what's not. So I'm going to take my own advice, grab a beer, and go soak my "head" in a hot tub.




(Good Friday - 30 March 2018)
I'm up early this morning (sigh), at least, earlier than I'd be if Ann wasn't working today, and she's not...
Good thing I'm working remotely today because my gut is telling me ready or not, time to get up . Anyway, the early start let's me get in another three hours of work, and when added to
the extra four I put in last night, leaves me with one hour left to make my eight for today. And I'll save
that hour for right before
lunchtime.
I'm way overdue for a haircut, so I'm off to take care of that and pick up the pieces I need for cutting the new copper plumbing to the kitchen into the old CPVC first. After spending the morning "down in the hole" evaluating what I'll be able to do and in what order, I hear the Slack chime beckoning me to respond to customer questions... It can wait until I'm back out of the hole because by now I'm filthy and covered head to toe with dirt from under the house. Sand and dirt covered in coal soot covered in oil furnace soot and now all of it covering me until I wash it off.
In any case, after spending that last hour back and forth on the Slack channel, it's time to say that's my eight as far as work goes and get back to plumbing. Time to bite the bullet, turn off the water to the house, get back down in the hole, and start cutting out the old CPVC.
I start by trying to cut the old ½" CPVC supply off where the elbow sends it toward the kitchen, but because it's clamped up against the joist, I can't get the cutters in close enough to. I didn't want to have to cut out that old reducing tee and have to union back in a new one, but that's my only option to get the new copper over the beam. Next I cut the ¾" CPVC hot water supply off right at the old elbow that fed the old reducing tee that fed both the kitchen and bathroom supplies. Next I cut out the old reducing tee.
Let's get that copper over the beam next. By pushing against the 10' length of the new supplies I'm able to get them to bend enough to put them above the beam in their respective joist spaces. Now the moment of truth... How in the Hell do I get the old supply to connect up to the new kitchen supply and the remaining CPVC bathroom supply? I was going to pick up a 5' piece of both the ½" and ¾" CPVC pipe, but there was a rack with 2' lengths right there by the fittings, so I got lazy and just got one of each of those. That should be enough, right?
Well, after mocking up the new CPVC supply run using the entire 2' piece of the ¾", which ends up being too short, I start to question the wisdom of just getting a single 2' chunk... Until I come across a piece we cut out when redoing the bathroom plumbing. Just sitting down there in the dirt. Just long enough to put the reduced tee, elbow, and ½" union right where it needs to be to connect with the new copper. Nice. That was easy. I'm about ready to glue it in place when I realize that's probably not the best idea since I still have to solder the brass piece of the union to the copper, and that's exactly where the new CPVC would be sitting if I had glued the new stuff in.
Change of plan... Time to solder up the union brass fittings to the ends of the new copper supply lines. This ought to be fun, laying on my side right next to where molten solder will probably drop, and roll right up to my skin. First I need to clean and flux the connections. With that done on the hot water line, I strike the torch and heat the brass until the joint draws in the solder. I let a drip of solder drop, it hits the cardboard I'm laying on and starts to roll toward me... Holding my breath until it stops short. Alright, I let another drop fall and it rolls a bit closer, but that's really all I need to assure myself that the joint will be solid.
Repeat for the new cold water feed, except this time the solder drips right into the dirt, sizzling but not moving. Time to get out of the hole for awhile and let the molten metal cool. More questions from the customer, but it's alright, I'm waiting for things to cool off anyway. The only problem is I can't sit in my office chair to type the response. After that brief distraction, I'm back in the hole mocking up the cold water feed. The hot water fitting is still hot, so I imagine the cold water fitting is even hotter, hot enough to burn me I assume.
Let's glue in that new CPVC for the hot water side. I start by cleaning and gluing the elbows that will attach to the old supply. Next I clean and glue the long piece and the reducing tee, adding the ½" sections, elbow, and union fitting. This way I can glue the elbows in place, then slide the long piece over the beam, and glue it in place. The only thing that remains is to cut the valve side piece to length. Thankfully the valve feed is a threaded connection, almost like a union itself, so I'm able to unscrew it to get that twist to seat it while gluing it to the other side of the reducing tee. There! The hot side is DONE!
After the scare with the 2' long piece of ¾", I'm also assuming that the ½" piece will be too short too. Nope. I guess since it's closer than the hot water feed was, plus the length added by the extra elbows, is enough to make it just the perfect length. This one will be a bit trickier to glue... Partially because water is still draining from the hot water heater connection, but mainly because this will have to be a coupling connection, where both ends will need glued at the same time. This time I clean and glue the reducing tee and the length of ¾" needed to make the coupling and the ½" stub and elbow that points the opposite direction from the old one.
As with the hot water side, I make up the long piece, the other ½" sections, the elbows, and the union fitting. And again, as with the hot water side, I'll pass the long section over the beam, then glue it into the elbow on the feed end. The trick this time will be getting the water to stop dripping long enough to both apply the glue AND make the join with the coupling and tee before the water starts dripping again. I manage to get it all together and twist the tee and elbow into the correct position, but it feels like the connection on the tee side to the feed from outside wasn't fully seated. Only way to know for sure will be to pressure test it once everything's back together.
And the only way to get everything back together is to keep pressing forward. To that end, I glue the long section with the union into the elbow on the reducing tee and thread the union together. The cold side is DONE! Well, done with what needs done in the hole anyway. Time to get out of here and resume work in the kitchen, where I need to solder on the brass drop elbows. I also need to fit a suitable brace to secure the drop elbows to. A quick measurement and a trip to the garage to cut a chunk of 2x4 to fit has it. I figure out about where I need to mount the elbows then clean, flux, and solder them on. Some taps with a hammer and I screw the 2x4 in place followed by the screws through both the drop elbows.
I grab the box with the 2½" long ½" brass nipples and the leftover supply valves from the bathroom. Next I'm in search of pipe joint compound and the adjustable wrench. With all of that in hand, I install the hot supply valve, then the cold. Time to pressurize the system and check for leaks! I have Ann man the main shutoff valve to the house while I crawl back down in the hole to watch for leaks with the flashlight. I tell her I'll yell for her to turn it on, and if I yell again, turn it off real quick and open the hose bib.
I yell for her to turn it on... Wow. Just wow. Not a single leak down here! Not even the unions, which are only hand tight! But it's not time to celebrate yet. What's the kitchen look like? I get back out of the hole and head for the kitchen. Everything looks good here too! I grab a length of flexible plastic pipe from one of the water filter systems and connect it to the cold water supply. I grab a mud bucket and open the valve to bleed the air and gunk from the line. I fill the gallon bucket nearly full. Ann walks in and I ask her to empty it for me while I swap the plastic line to the hot water supply. I bleed it as well and Ann dumps the bucket again.
I bleed the air and gunk from the bathroom as well then head back under the house to check for leaks again, now that full pressure is exerted on the new plumbing. Still no leaks! I better go bet the lottery... This never happens! While I'm on a roll, I'd better get the rest of this sink base put in. Now that the new drain is in and the supplies are from the wall and not the floor, I can simply cut the necessary holes in the back of the new sink base cabinet and slide it into place. That was the whole idea behind doing all of this... Well, that and having copper in line with water I'll be drinking or bathing in.
I knew I'd be connecting and disconnecting a number of times, but mainly so I can, for when we refinish the floor. All of the base cabinets as well as the appliances will have to come out and go back on the front porch until the new floor finish has set up. Well, the refrigerator can stay in the house. That's still a ways off, but something I need to think about before it happens and plan ahead for. So first I'll need the new cabinet, which I slide into the kitchen, still in its box. I remove it from the packaging and slide it into position in front of the new plumbing from the wall.
Then I realize I won't be able to mark it's exact location until I have the dishwasher and beauty panel in position first. I slide the dishwasher into the kitchen, still in its packaging, then remove it from the styrofoam base. I slide in into position. Then I grab the beauty panel and set it next to the dishwasher. It looks like it doesn't have to be right up against the door casing too. I have to dig out the installation instructions to see how wide an opening to leave, but pretty much figure 24" would be nominal. I mark the locations on the wall and figure that's close enough for now.
With everything where it will go, I mark the centers of the supply valves on the back of the sink base cabinet. Now to find the correct size hole saw and make the cuts. With the holes cut, I slide it back until it until it contacts the drain, but even with the dishwasher out of the way I'm having a hard time marking around it. It's close enough to mark an approximate center and drill the appropriate sized hole. That's good enough for now. The sink base slides right up against the wall. I move the dishwasher back in place. along with the beauty panel.
I'm sick of tripping over the old sink and constantly having to move it out of the way, so I set the sink on top of the base using a couple of the scrap 1x3s left over from the new dishwasher packing I saved from when we took it out of the box around Christmas time. Wow. Has it really been three months already? That's it, I'm done. I'm too tired to do anything else and can't remember where I last saw the tail piece to connect the disposal to the drain anyway... Time to get cleaned up and hit the hay.
(Saturday - 31 March 2018)
Still sore from yesterday, but I'm dressed before Ann this morning! Time to get those tail
pieces out of the plastic plumbing tool box and see about getting this new plumbing connected
and tested. I left the faucet in the old sink, as well as the mounting ring for the garbage
disposal, for just this reuse opportunity... Time to make it count.
I left off last night a little after eight o'clock, mainly because I was tired, but I used the excuse that I couldn't remember where I put those tail pieces I needed to extend the disposal outlet down to the new drain. I must have really been tired last night, because I already know they're in the bottom of the plastic plumbing tool box this morning. I have what's left of a 6" and a 12" long one. I say what's left because I had already used both of them previously in just such a temporary situation, but had to snip a bit off the ends to fit.
I grab those and the new p-trap fittings I bought especially for the new sink installation. Turns out what's left of the 6" one is just long enough to span the gap, but it looks like I'll need to extend that drain line out from the wall a little more than the 1½" it is now. Another 4-6" piece should do the trick, but I have a lot more to do before I'll need that piece, like test fitting the dishwasher and the supplied plastic 4" electrical box with pre-attached pigtail plug that snaps right into a socket on the back of dishwasher itself. As I'm removing the feed wires and the old junction box, the plaster just falls off the wall.
I'm glad I didn't just assume there would be enough room behind it to just replace the 4" metal junction box with the new plastic one that came with the dishwasher. I wondered why the installation instructions said to make sure to route the connections through one of the "cable organizers" on either side at the bottom of the back of the dishwasher. When I try to test fit the electrical junction box I see why they say that. It's too tall to fit. Just about anything will be too tall. Change of plans...
I'm already reluctant to bring the electrical connection for the disposal through the wall and into the back of the new sink cabinet, but now I'm going to have to bring both of those connections through the back of the cabinet... There's no room for anything on the wall behind the dishwasher! It's probably a good thing it turned out this way though. I can't imagine how upset I would be if we have to replace the dishwasher in the future, only to find out the feed needs moved into the wall behind the cabinet. The wall I already plastered shut with a cabinet attached!
Well, it's not quite plastered shut yet, that's waiting for me tomorrow. Today we get to finish the dishwasher connections and test everything. The installation guide says to cut a 2½" hole within a 2½" x 7" area in the bottom back corner of the cabinet, yet the picture shows extra space between the back of the cabinet and the hole? Guess I can't blame the illustrator for not knowing simple math and measurements... Sure I can! I figure a 2½" hole is big enough to allow for a little slop in position anyway, but it still bugs me when I see stupidity like this in an installation guide.
At first I'm thinking I can get away with a smaller hole, but just drill the specified hole. Next is to locate where to run those electrical feeds. I need to allow for the sink dropping down at least 9" from the top of the cabinet. I give it another ½" or so to allow for any slop in the installation once the countertops are installed. Once I remember what I did with the old metal outlet box for the disposal, I place it and mark for the hole. We must have burned up all of the ¾" spade bits, because all I can find is the 13⁄16". Good enough. Now let's feed those wires... Yeah, we'll get back to that.
Need the water supply line from the old dishwasher, it's a special garden hose to 3⁄8" compression gadget thingy, not supplied of course. Which is why I'm taking it off the old one. I get it all swapped over and running through the correct cable organizer and move it into place next to the sink cabinet. This is one of those times it would be nice to have some help, someone to feed the connections through the hole while I manuever it into place. Oh well, I manage just fine and soon find myself looking for the old drain line for the band clamp to attach the new drain line to the garbage disposal inlet.
I get it all set and connect the supplies to the faucet and open the supply valves. Good. No leaks. Let's test the drain connections. I open the faucet and wait for the air to clear. Good. No leaks in the drain either... At least, not under the sink anyway. I move out the dishwasher to check the new drain plumbing in the wall and see something I'm not happy with. Wow. I knew it was all to good to be true, no leaks so far, until now. The bottom fernco no hub coupling is leaking around the bottom cast iron connection. Great! I turn off the faucet and start the process of disconnecting the dishwasher drain line.


Note to self, next time, just use the old drain line to test. I move the dishwasher out of the way for a better look. Yep. It's leaking. And not just in one place, but many. At least three that I can see. I grab the tool kit with the socket and wrench I'll need and try tightening the clamp. Wow. It seems loose. Maybe that's all it needs! I wipe off the leaks and using the old drain line on the disposal, more as a plug to stop the water from pouring out the inlet than anything else, I turn the faucet back on and look for leaks. Nope. That wasn't it. Damn!
At least it seems like it's down to leaking in one spot, along the casting seam. I loosen the coupling, slide the metal sheath out of the way, and "roll up" the rubber sleeve to expose the cast iron pipe. Then I grab a couple of flat files and try my hand at knocking down the high spots where the rubber sleeve mates with cast iron. It looks like it may have been leaking around the letters cast into the pipe, hidden by the lathe, but now obvious once exposed. I get around the entire circumference as best I can, in some places bright iron shining under the harsh light from the flashlight.
Okay. If that doesn't fix it, time to punt... I roll the rubber sleeve back into place, slide the metal shield and clamps back into place, and tighten everything up. It feels much better this time, meaning I actually get a good feel from the feedback on the wrench, and I see the band clamps start to cock slightly as they tighten. Alright. Let's see what we get... Water running. Pipe dry. We'll just let that run for awhile and keep watching for leaks. Water still running. Pipe still dry.
Five minutes and still no leaks, although I'm not sure what I'm seeing at the top of the coupling around the 2" plastic pipe. Something shiny and reflective, but I can't tell if it's water or not, even with glasses. It's not welling up and beading, so I think we'll call that tested and not leaking. All that's left is to connect up the dishwasher and make sure it works. At first I thought that nice little plastic junction box would be a good thing, but having to wire it up, you can tell it wasn't designed by an electrician - or anyone that handles 12# copper wire for a living!
For starters, a normal "pigtail" in an electrical box is supposed to be about 6" long, but this thing says to make them 2" long? Then you have to "land" the stripped ends under the clamping screw terminals, but there's no way to get the wire into the damned opening short of making a bend in each wire! Then the cable itself going into the box needs a strain relief clamp. Anyway enough ranting. I suppose if you were connecting it once to install it, it wouldn't such an issue. Considering I'll need to have this sink base cabinet in and out, more than once, let's just say I'm not connecting and disconnecting this every time!
I pull both 12/2 romex cables through the metal outlet box through the knockout in the back of it. I've already punched out another knockout in the side and installed a strain relief clamp, which I pull the dishwasher feed through, then through the strain relief clamp on that plastic box and snug both down. I'm having a helluva time landing those connections under the screw clamps, as predicted, but finally manage to get them secured. Next I connect the outlet to the switched garbage disposal feed. Last I screw the boxes to the back of the cabinet and screw the outlet to the box and the cover to the outlet.
Time to flip on the breaker and "POP!" Damnit! I knew I shouldn't have messed with the switch box! I rearrange the connections so that a bare ground isn't touching a bare hot somewhere and try it again. That's better. At least no pop, but does it work or did I open up a feed? The dishwasher beeps. That's a good sign. I switch on the disposal momentarily and it spins up. Good. Let's call the eletrical done for now. Next up is testing the dishwasher. But now I'm hearing a different beeping... Sounds like it's a battery backup complaining, and not in a normal fashion, more of an ailing, failing fashion.
I find the big 1300W rig in the living room is smashed between the wall and the new bench under the window and covered by the curtain and sheers, with all ventilation closed off, overheating! After several seconds, the complaining slows and eventually stops. That's good. Last thing I wanted to do today was spend another couple hundred dollars on a power supply that was working fine ...
Not sure why the breaker popping triggered it to start complaining, but I soon realize the TV is off and the reason it stopped complaining is it turned itself off. Great! Maybe I will be buying a new power supply today after all. I press the power button and it comes to life. No alarms. I turn the TV on and see the FireTV stick booting. Good. Crisis averted. Now I can get back to what I was doing... Now what was I doing? Oh yeah, testing the dishwasher! I walk back to the kitchen and take a quick glance at my options. I don't really want to run (and wait on) a full cycle, but notice there's a rinse cycle that runs about 9 minutes. That looks good, so I select it, push the start and close the door.
I hear it start to fill with water and purge the air out of the line. Wow! This thing is quiet! It shines a red light on the floor when it's running, just so you know it's running. We'll give that time to finish and drain and... Wow. Looks like it fills a little, drains a little, fills a little, drains a little, repeatedly, until it finally drains all the way at the end of the cycle. I'm watching and checking for leaks and finding none. No leaks in the supply line, no leaks in the drain line, no leaks at the disposal. Now if it were all just connected like it will be long term I'd feel better.
To that end, I take a look at the water filtration system and all the hoses and fittings I have available to make that happen. I see there is a compression 3⁄8" to compression 3⁄8" to compression 3⁄8" brass tee already, that will allow either the cold or hot water supply to connect to both places it needs to, the faucet and refrigerator line or faucet and dishwasher line, respectively. I look through the copper plumbing tool box for another one, already pretty much knowing I won't have one, let alone anything that will be of use. It was worth a shot though.
That's alright. I figure we won't really need the dishwasher connected as much as the ice maker in the refrigerator, which has to be running low by now. It's been a week without water in the kitchen and it's time to do something about it. With the filter and bracket in hand, I figure out a good place to mount it where it will clear the deeper sink and still allow for replacement of the filter cartridge. I mark it, drill pilot holes for the screws, and wind them in just until snug so they don't break through the outside of the cabinet.
The bracket has a key slotted arrangement where you can pass it over the screw heads then slide it down to allow it to hang from them. I drill a pilot hole for the bottom screw that will hold it in place and wind it in just until snug as well. Time to connect the water line 3⁄8" compression fitting to the to middle 3⁄8" connection on the brass tee... Except, the water line to the refrigerator is ¼", with a 3⁄8" adapter fitting? Wow. Wish I'd have known that earlier. Change of plan...
I take a break and get out the laptop to see what my options are. A search of brass fittings at Lowe's shows 17 pages of results. Hmmm... Let's skinny that down with ¼" to 3⁄8" adapter. That's better, only five pages and I see a fitting that will work, one I didn't even think they made! Now I'm thinking since I need to make a Lowe's run anyway to get the fitting I need, I might as well get everything I need to button up this installation. I make note of part numbers and what aisle and bay they're in so I can just go and get... Best laid plans. They don't have all the fittings I need, but the one they do have and some quick work will allow me to get going.
It used to be irritating, but now I find it comical that the web page that shows the store's inventory, and therefore the main computer inventory itself, is ALWAYS WRONG! Alright, it's still irritating going to the store thinking they have what you need only to get there and find out they don't. Before I left Ann said I should go to Ace to avoid the crowd from the big 10% off sale. I told her I already looked up the part numbers and everything but hadn't for Ace. So guess what the the person told me at Lowe's when I told them it said they had 12 online but I couldn't find any?
Yeah, saw that and was just looking for them and couldn't find them, but if I ran across the street to Ace... Wait, what? You know your entire plumbing department is in disarray and you're sending me to the competition? Wow. Just wow. Anyway, I got another piece of ¼" copper and new 3⁄8" compression fittings to make a short compression to compression connection just in case I can't get the one I already have to work, as in tighten it without leaking. Still shaking my head over that one. Back home and I'm back under the sink.
I was able to get the compression 3⁄8" to ¼" compression to 3⁄8" compression brass tee for the cold water line. I was hoping they had the all male version, but after what I just saw, I'm lucky to have this. Unfortunately, it means I have to use the push in 3⁄8" to compression 3⁄8" adapter to make this work. I snug down on the ¼" refrigerator line and open the supply valve. Yeah. Leaking. I tighten down the ¼" refrigerator line and still leaking. I tighten down the ¼" refrigerator line even more.
Still leaking, but I don't think it's the refrigerator line anymore, so I snug down the faucet supply. Better, but still a slow leak. I snug down the last connection it can be, the push in adapter. That seems to have stopped it. Time to switch to the hot water supply. I disassemble the existing compression to compression connection to the all male 3⁄8" brass tee and connect it to the supply valve, snugging it by hand for now. Then I connect to brass tee to the other end as well as the faucet and dishwasher supply connections. I snug everything down and open the supply valve.
Yep. Slow leak at the end of compression to compression "adapter" I knew was going to give me problems. I tighten it down quite a bit. Seems to have slowed it at least. Now one of the other lines needs snugged down. Good. But it's still leaking from that compression to compression adapter though. I tighten it down until it becomes markedly more difficult to turn the wrench. Guess up to now it's just been "flowing" that sleeve into position to seat. That has it though. I set the dishwasher to run through another rinse cycle and flush the refrigerator line by filling two pitchers full with water from the door dispenser. Lest I forget, I turn the ice maker back on.
As we're sitting here enjoying our newly available water in the kitchen, we hear the ice maker fill, and what sounds like a quick burst of trapped air? Dunno. Maybe since it's the highest point in the system, any trapped air travels up into the ice maker line? Later we hear the batch of ice it made drop into the bin, so we're satisfied it's working again. I must say, I didn't think I would miss having water in the kitchen for just the week we were without it, but I did and I could tell it was starting to bother Ann as well. Not anymore!
There's still plenty left to do before declaring victory, but for now just getting the wall and the plumbing closed back in would be a good start. That and some plaster and some paint. At that point the floor refinish and then final cabinet installation. Then we can schedule the installers to come and measure then install the countertops. But I'm getting ahead of myself again. First we get the sink wall finished.
So up next, the sink wall saga...
<< Previous | Kitchen | Demolition | Plaster '70s Wall | Plaster Cabinet Wall | Wall Cabinets | Sink Cabinets | Plumbing | Plaster Sink Wall | Flooring | Cabinets | Countertop and Sink | Finishing Touches | Next >>